The Shed Foundation: Make It Right For The Purpose And Location Of Your Shed
The shed foundation is the key to having a solid building that will last for years. This is true of the foundation for any building. Make it solid and level and the rest of the construction will go much more smoothly.
In our area of central Ontario, any construction must take into consideration the frost of winter. Frost can move and crumble even rock and concrete, but there are proven ways to avoid it's damaging effects.
There are several totally acceptable types of shed foundations that can be used in our part of the world
Floating Shed Foundation:
The simplest is using concrete deck blocks. They are inexpensive, available from the local lumber yard and fairly easy to install. The tip here is to remove the top layer of soil beneath each block (footing).
This is called a "Floating" foundation as the supporting deck blocks are not set down in the ground below the frost penetration line and could therefore move a little when the ground freezes in winter.

TIP: To minimize frost movement, take out all of the black soil, down to the soil layer beneath ('B' horizon) because black soil is the type of soil most susceptible to frost heaving. Fill up the hole with coarse gravel and then place the deck block on top at the level you want to start your floor deck.

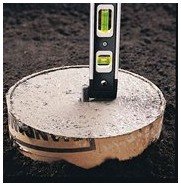
Square the footings using a tape measure. The diagonal measurements will be the same if the corners are square. Level across the footings in each direction using a straight piece of lumber and bubble square to ensure that your foundation (and the shed) will be level.
Concrete Shed Foundations: The Floating Pad
If you want a concrete floor in your shed, the first step, to avoid as much frost heaving as possible, is to remove the topsoil for the entire area of the shed and replace it with compacted gravel. This will eliminate radical movement and the pad and building may lift a little in the winter, but it will move as a unit, hence the name 'floating'.
The thickness of the floor pad would normally be from 4 to 6 inches, so you will need wood forms in the appropriate size. Note that a front step was also framed and poured at the same time.
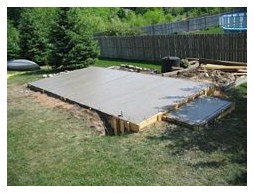
In the case of the shed foundation above, it has been sunk into the ground to avoid a large step up into the shed.
The forms are cut to proper length and nailed together in a square then laid out and staked on top of the gravel bed. This is where it is important to make sure all is level and square. If using 2x lumber forms, drive stakes every 24 inches along the perimeter and screw them into the form. Using 1x lumber forms will call for stakes at closer intervals to deal with the tendancy of the lighter form to bend. Failure to install enough reinforcing stakes could result in the forms bulging out with the addition of concrete. You would end up with a concrete pad with bulging (not straight) sides. Liquid concrete is heavy and has a lot of pushing power.
Slightly overfill the forms with concrete and then level and smooth it out by dragging a straight 2x board across the forms in a back and forth manner with a friend on the other end. Bang on the sides of the forms with a hammer early on when the cement is wet to settle the concrete against the side and remove air bubbles. Smooth the wet concrete as best you can with trowel and float and as it sets up harder, round the edge with a corner tool and further smooth the surface.
When the cement is still soft enough, Anchor bolts should be imbedded around the perimeter of the pad for bolting down the bottom plates of the shed.
Wait at least a day before removing the forms but be careful not to break the still-green concrete.
Larger pads should have reinforcing rod imbedded in the concrete for added strength (to prevent cracking). In either case, your concrete supplier will ask the purpose of the concrete when you order so he will know how strong to make it but you should ask them to add fiber to the mix for added strength. The building could be placed directly on this shed foundation as it is or you could add a course of concrete block around the perimeter to raise the walls higher.

Concrete Foundation: Sono tubes
In the case of Herb and Sharons' garden shed, we wanted a foundation that would be solid enough to hold up the building with it's heavy contents and that would also prevent any movement. A floating pad wouldn't work in this case because of the slope of the ground in the selected location. I elected to use concrete form footings.
The shed foundation would require 9- 8inch tube footings sunk to a depth of 3 to 4 feet so that the bottom of the footing would be below the frost line and therefore not move in the winter.
My plan called for 3 footings along the front of the floor deck, 3 along the back and 3 across the middle that would carry a support beam.
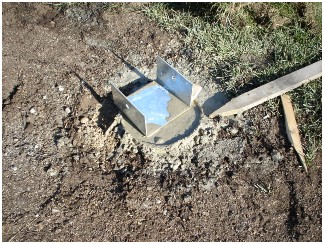
The top of each footing would be at or slightly above the ground and carport saddles would be imbedded in the top of all but the front footings. The saddles would hold the bottom of the wooden posts supporting the new beam and floor deck.
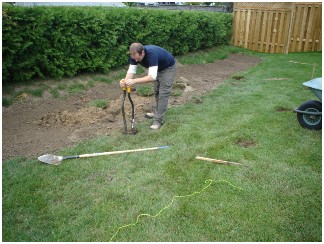
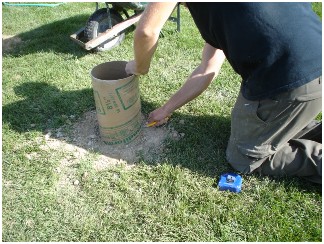
Each hole is dug, in this case by hand, and the concrete tube form is placed in and plumbed with a level. While I hold the tube upright in the correct position, John backfills around it with soil removed from the hole. The backfilling keeps the form firmly in place.
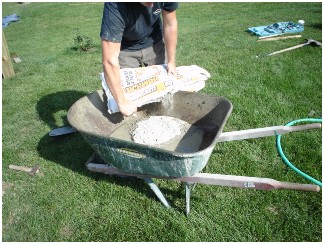
When all the tubes are in place in the ground and cut off just above ground level, it's time to double check the squareness of the layout and then to mix and fill each tube with concrete. If you had to fill a large number of footing tubes, you might concider a ready-mix cement company, but in this case we'll use the good old manual method using a wheelbarrow, hose and shovel to mix. That old wheelbarrow has mixed a lot of concrete for us.
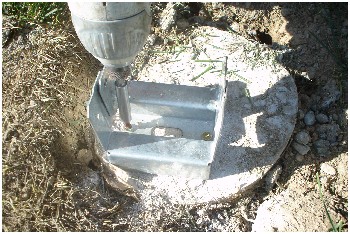
When all the tubes have been filled, it's time to place the metal saddles. Don't wait too long and don't use quick-set cement or you might have difficulty pushing the shaft of the saddle into it. Again, measure corner to corner and across all sides to ensure the wooden posts are properly spaced and in line with the perimeter of the shed deck to be built. For appearance sake it is important that the metal saddles are directly beneath the corners and sides of the floor deck.
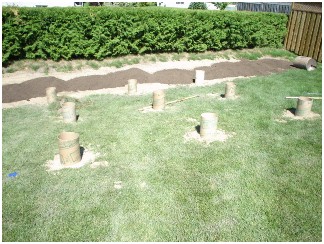
This is the next day after the concrete has set and the footings are ready for the posts and the floor deck.
The shed foundation footings at the front of the deck, where we did not install any of the saddles will each receive a metal cleat as shown below. These are installed at the time the deck frame is being put in place to allow for exact placement. The metal cleat is fastened to the concrete footing with tapcon concrete screws and it not only anchors the deck to the footing, it lifts the wood from the concrete creating a gap that prevents contact with the moisture from the cement and the ground. You will need a hammer drill to pre-drill the holes in the concrete for the tap con screws. Having wood (even pressure-treated wood) in contact with the ground is an invitation to rot.
Next Step...Build the Deck Frame, Floors and Walls
Return to Top of Shed Foundation Page
Shed Building Steps
Click the image to go to the page you want.