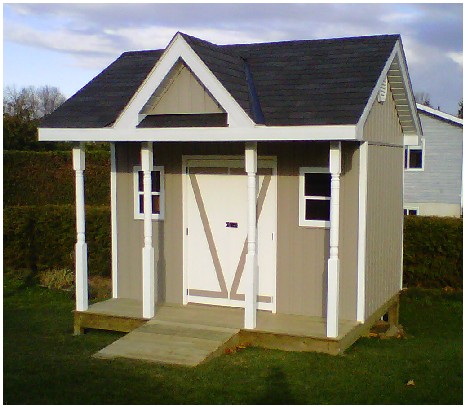
Build Your Own Shed: Construct The Floor Deck and Frame The Walls
Build Your Own Shed: Now that the concrete shed foundation footings are in place, we are going to frame the floor deck and then level it on the footings using wooden posts for support on the perimeter and installing a beam in the center.
Firstly is a sketch of the floor framing.

The lumber dimensions are 2"x8". The double rim joists at each end are screwed together with ceramic coated screws every 16 inches or so to bond the two together to form a beam that will help support the perimeter walls of the shed. For now we have not doubled the front and back plate or added all the centre joists.
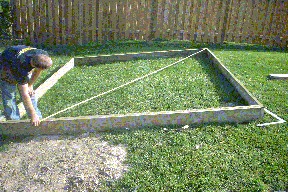
John is measuring the diagonal line to a point on the double rim joist from the far corner to square up the frame. We use a little high school math (Pythagorean Theorum) to mark and square the frame. When it is square, a board is screwed onto the frame on a diagonal to hold it square so we can move it into place over the footings. We double checked the 'squareness" of the frame by measuring the diagonals, tip to tip, and as the measurements where the same, we knew it was square. When you build your own shed on level ground, you might be able to build the deck frame complete, right on the foundation.
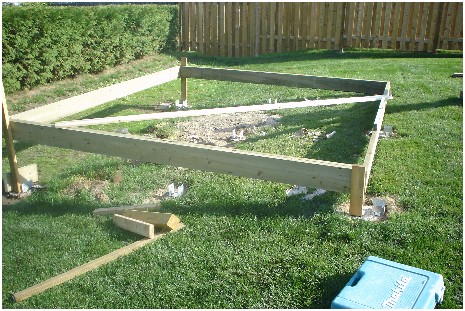
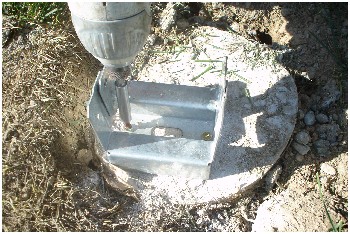
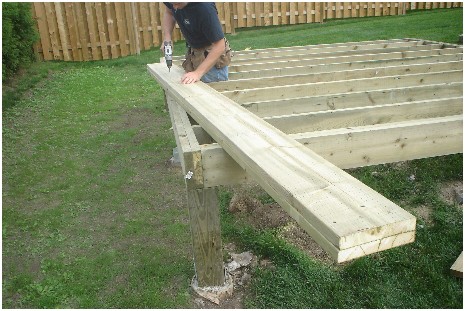
Firstly, we fastened the highest corner of the frame to the metal cleat. The frame rests directly on the cleat. That would be the corner in the upper right of the picture above. Then we leveled up the front of the frame using a bubble level and by installing a temporary support with screws at the near corner. Then temporary supports were installed at the remaining corners to hold the whole frame level in all directions.
It's then a simple matter to measure down from the underside of the floor deck frame to the top of the footing cleat to determine the length of the post needed at each footing. Here you see the support post in place after removal of the temporary support. The post juts out from the front of the frame, but the second plate will rest on that when attached. The second plate has not yet been added to the front and the back as we still have to install the remainder of the joists and we won't have to use joist hangers if we attach them by screwing directly through the front and back plate. A double plate would be 3 inches thick and our screws would be too short to attach the joists. Doing it this way also keeps the frame light enough to move around and adjust easily. If you build your own shed on level ground you may only need a few shims on top of the footings to level out the frame.
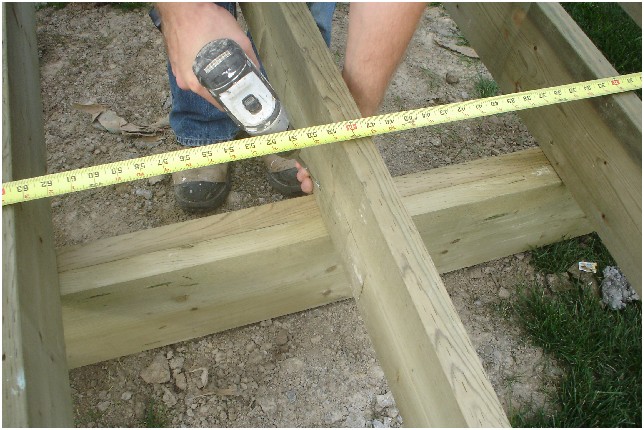
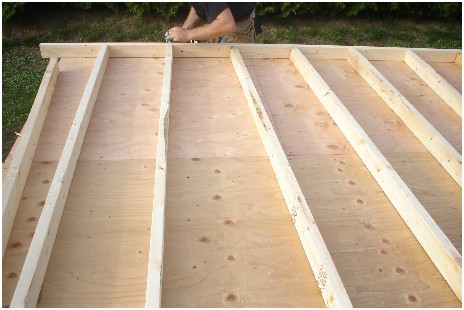
The front and back plates are marked every 16 inches on center. Which means the the center of the first joist (after the double rim joist) must be exactly 16 inches from the outer edge. Mark the joist locations 3/4 of an inch to the right of the center and place an X on the side that the joist will attach. Use a square to mark the edge of the joist on the face of the plate. Each of the remaining joists will be 16 inches on center from the first. This will keep all of your joists properly spaced and vertical to accommodate the plywood flooring to go on top.
Now, the second plate is screwed to the first at the front and the back, every 16 inches to create a plywood effect, strengthening the beam.
When all joists, plates and posts along the front and the back are in place and fastened with screws, we build the beam that will go beneath the middle of the floor deck. A beam may not be require when you build your own shed.
We built the beam out of 2 2x10' boards screwed together with 3 3 inch screws every 16 inches and the length cut 3 inches shorter than the total width of the shed frame. I don't want the beam to extend all the way to the outside of the deck, but to be recessed from the end by 1 1/2 inches. This is also the reason we placed the shed foundation footings slightly narrower than the footings at the corners.
It is easier to install the beam after the floor deck frame is in place by sliding it under and lifting it into position and then attaching it with angled screws through the joists. The 3 support posts are then installed beneath the beam on the footings +and screwed in place as with the front and back plates.
Stretch your tape measure across the top of the joists above the beam and then attach each joist to the beam with an angled screw on each side so that the spacing is 16 inches on center. This anchors the joists to the beam and straightens out any natural curves in the joist and ensures that the spacing is still 16 inches on center. If you build your own shed without a center beam, the joists should be measured and centered when you nail down the flooring.
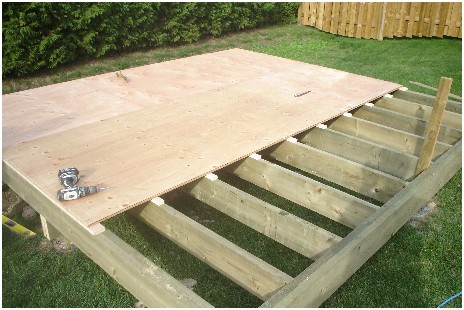
Above you will see a picture of the deck frame with plywood installed. This will be the actual floor of the shed. The exposed framing in front of the floor will be the porch outside the shed and will be covered with pressure-treated 5/4 deck boards to be more weather resistant than ply wood. You will also notice that we raised the plywood above the joists by 3/4 inches to bring the shed floor about 1/4 inch above the deck surface outside. To do this we simply ripped some strips of 3/4 inch plywood and tacked them to the top of the joists. Unless you are planning a front landing or porch you might not have to worry about this when you build your own shed.
Now On To The Walls...
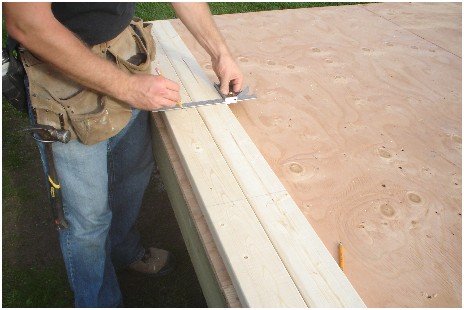
The walls of this shed will be 8' 1" high and built with 2x4" stud framing. We started with the back wall. When you build your own shed, he best way to mark out the locations of each stud is to lay out and mark the top and bottom plates together. These are cut exactly the length of the back wall and the studs will be placed every 16 inches on center, as with the joists of the floor deck. Here I am marking the stud locations with a square, both plates at the same time to ensure the top and bottom are exactly the same.
The 2x4" pre-cut studs are 92 1/2 inches long. Together with the combined thickness of the bottom plate and two top plates (second top plate to be added when the frame walls are erected) the total height will be 97" (8'1"). Here we use the shed floor as a work surface to construct the wall frame.
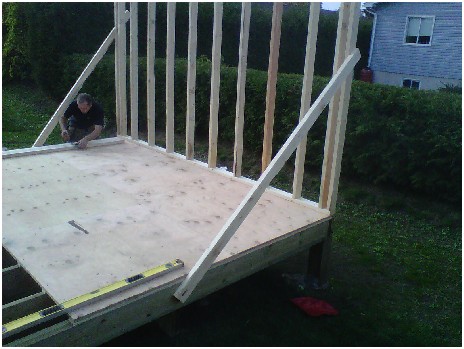
The finished wall frame is raised into place, screwed to the shed floor and then plumbed and supported, as shown, with temporary braces while the adjacent wall is framed. Each wall frame is raised and attached with screws to each other.
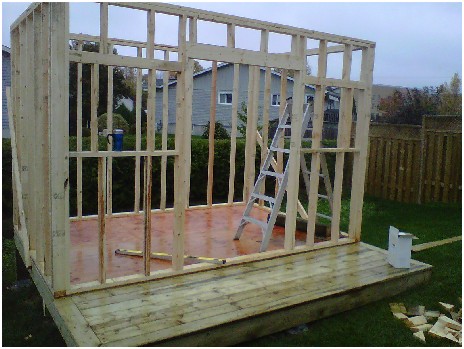
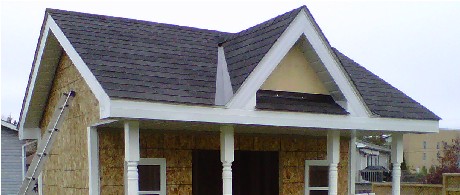
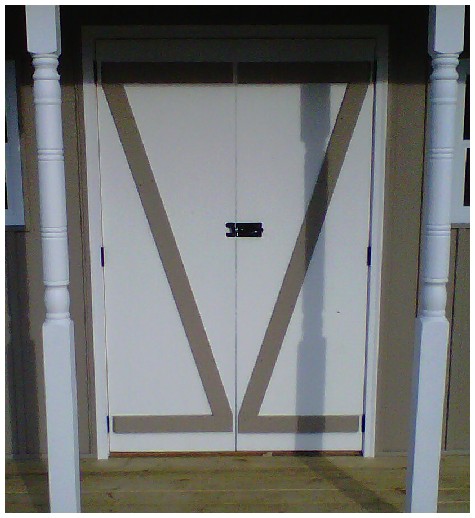
Here you can see all the framed walls in place prior to nailing on the wafer-board sheets. The second (top) plates are nailed on starting with the side walls (corner to corner) so that the adjacent walls (front and back) are locked together. The door is framed with an opening of 50 inches wide and 81 inches high to accommodate a pair of 24" x 79 1/2" doors. Windows with brick-mold frames were purchased inexpensively at Home Depot and the openings are framed to be 1" larger than the window frames overall, which will leave a 1/2 space on all sides of the installed window. Window and door sizes and placement will vary according to your plan when you build your own shed.
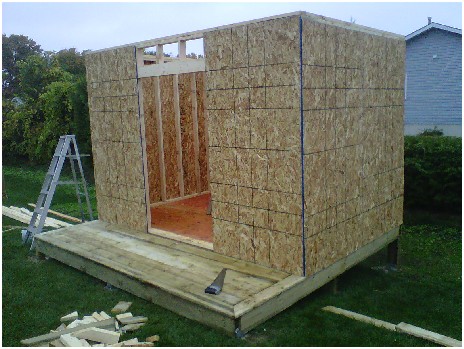
4'x8' sheets of 1/2" wafer-board (OSB) sheathing are nailed onto the frame with 2 1/2 galvanized ardox nails. The installation of the sheathing will square up and stabilize the walls. We nailed sheathing right over the window openings and cut out the opening afterward using a sawsall (reciprocating saw). Now we are ready for the roof framing.
It's not too difficult to build your own shed.
Next Step: Building A Shed Roof
Return to the top of Build Your Own Shed: Construct The Floor Deck and Frame The Walls page
Shed Building Steps
Click the image to go to the page you want.