Building A Shed Roof
Building a Shed Roof: There are many ways to build a shed roof. The methods are as varied as the style you would like to produce.
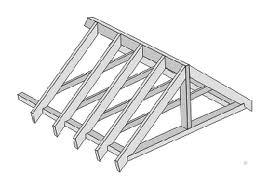
The standby method to frame a roof, even on a house, is to use manufactured trusses or to frame it as shown in this diagram, with rafters attached to a ridge board that slope down and overhang the outer walls. the slope is determined by the height at which you affix the ridge board to the end supports at the gable.. Then each rafter is cut and nailed in place at the ridge and top wall plate.
The spacing of the rafters is usually 16 inches O/C (on center). 24 inch spacing is normally used when using manufactured (engineered) trusses on house, but this is just a shed and won't require the extra expense of engineered trusses.
The next sketch shows a roof design that gives you a loft area and a simple, one direction back slope.

This would be great for extra storage space above. This design obviously calls for different framing than the one we are building now, with longer studs and a header or lintel in the front to hold up the roof structure over the opening.
The floor of the loft is also the ceiling of the lower shed and is installed after the walls are erected. This style of construction is called balloon framing.
When building a shed roof I like to make and use trusses, simply because they are easy to make, easy to install, solid and incorporate the collar ties (ceiling rafters that hold the front and back walls at a consistent distance).
For the shed we are building, we also want an over-hang of 36 inches over top of the front porch. Trusses make this easy.
Building A Shed Roof: Trusses

First thing to do when building a shed roof is to screw together a mock-up truss and put it on the top of the walls as a way to judge the height and proportion. We could then stand back and look at the overall profile of the shed for proportion before building the remainder of the trusses.
It looked good to us and to Sharon, so we carried on...
The total span (bottom member) of the truss is to be the same as the floor deck we constructed earlier...11 feet. We built the peak of the truss to be directly above the center of the span, not the center of the shed. This will give us an identical slope on the front and back.
Once we determined the height of the mock-up truss, it is time to construct a proper truss.
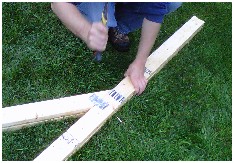
We simply marked the cut lines on the mock-up truss with a pencil, including the cuts on both pieces at the ridge and cut the angles with the skill saw.
The joins are made initially with screws toe-nailed in to hold it firmly and then we used gang-nail plates on each side to add extra strength to the joints. The first truss completed is used as a template for the rest, laying the pieces directly on top of the template to mark them for cutting and assembly.
An upright is also installed to sit directly above the front wall of the shed to further strengthen the roof.
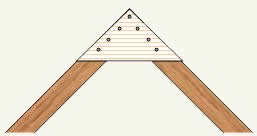
An alternative to the metal gang-nail plates is to use plywood plates you cut yourself as shown below at each of the 3 truss joints. this makes for a very strong structure.
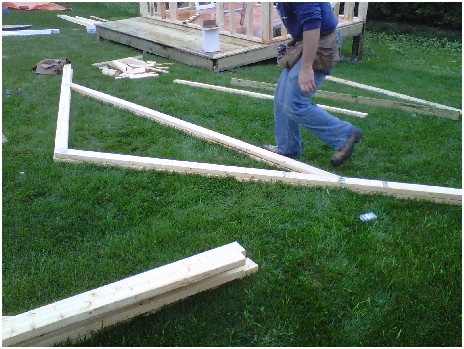
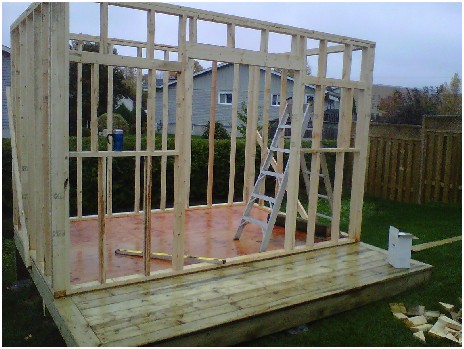
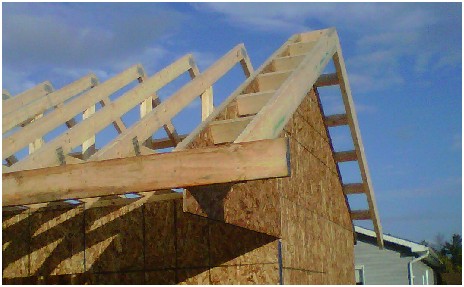
The top wall plates of the shed were measured and marked every 16 inches on both the front and back walls of the shed to show the placement of the roof trusses.
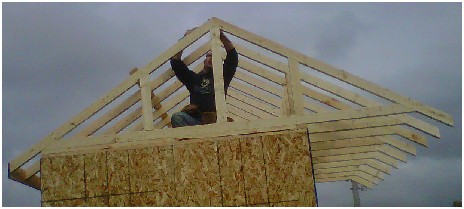
To hold the first truss upright we nailed a support 2x4 to the end wall. Each successive truss was put up 16"O/C and held upright with nailer board screwed in 16"O/C on the upper back slope, as shown in the picture of us building a shed roof.

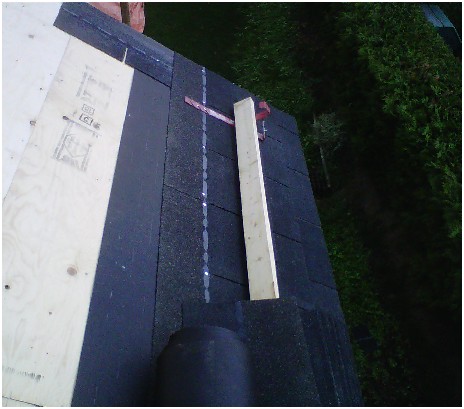
The rafters are usually installed with a longer overhang (tail) than desired, then, measuring out from the wall at both ends to the desired overhang point, a chalk-line is used to snap a straight line along the top of the rafters. As we will be installing eaves troughs on a vertical facer board for this shed, the tails will be cut vertically (plumb) so I simply used a bubble level to draw the cut lines. After cutting, the facer board is then nailed to the rafter tails with the front top of the facer board in line with the slope of the rafter.
We added a couple more upright nailers to the gable ends to support the sheathing and siding that would be nailed there. In this photo you can see that the rafter tails have been snapped and cut and a facer board has been nailed on the left side.
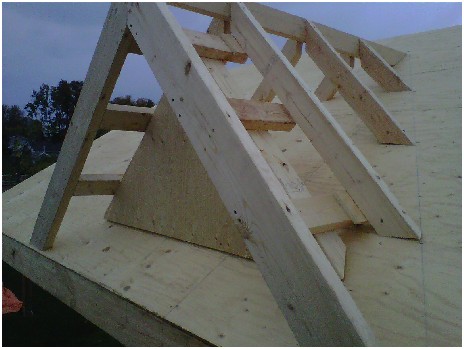
In the photo (below) we have installed and trimmed the sheathing on the gable ends, cut and installed struts (sometimes called rakes or the ladder) to support the overhang and also installed the facer board. The front facer board has not yet been trimmed. The struts are screwed in place 16" O/C and will hold firmly.
Building a Shed Roof:
It's Time For Plywood...
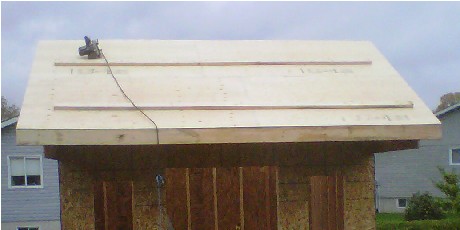
Next comes the plywood sheathing that is nailed to the trusses and stabilizes the whole roof structure so the temporary nailer on the back slope can be removed. We nailed on 2x4" cleats so we could safely walk on the roof to install the upper sheathing.
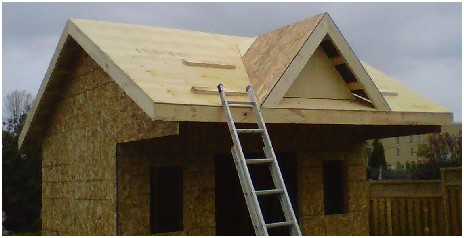
A false dormer is framed on the front of the shed roof as shown. I built it to be the same width at the base as the door opening beneath it. This is not a necessary step when building a shed roof, but will make the appearance of the shed much more interesting. I also installed a small triangular wall, recessed about 8 inches, to attach soffit and siding.
This was constructed starting with the front 2 facer boards and the ridge board. Note the chalk line snapped from the top where the ridge meets the shed roof down to the point where the facer board rests on the roof. This will give you a line for the short 2x4" rafters in between.
And a Dormer!
Here it is all together with the dormer sheeted.
Shingles Anyone?
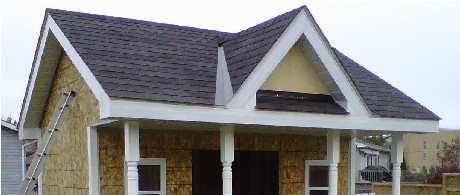
The roof is shingled, just as you would shingle a house roof. Metal eaves starter (drip edge), felt underlayment, metal valley steel and 25 year shingles to match the house.
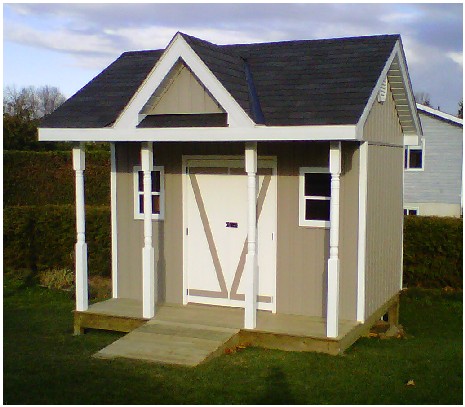
The roof is finished, along with the soffit and fascia. You will also see the posts that have been installed at the front of the porch and support the overhang. Building a shed roof is probably the most complicated step in this process. The windows are now in and we are beginning to install the vinyl siding.
Next Step: Shed Doors
Return to TOP of Building A Shed Roof Page
Shed Building Steps
Click the image to go to the page you want.